Tuesday, January 31, 2012

Moroccan Chickpea Salad

Yesterday at the gym a friend asked me if this recipe was on my blog. Funny thing was I had purchased everything to make it almost two weeks ago intending to get it on my blog. It never happened and I used up the cilantro for something else so I had to get more at the store. And that my friends is why I am not a meal planner! If I make a plan I just can't stick to it! It is inevitable!

She tasted this salad at a church potluck. I like to bring "different" things to potlucks or get togethers because people seem to have an adventurous spirit when they walk through a line and pile things on their plates. Several people asked me that day for the recipe. It is an interesting combination and I think people are surprised how much they like it.
Hallelujah for the sun shining this morning. Picture taking went much easier! I guess I should always cook in the morning. Start by draining and rinsing two cans of chickpeas also known as garbanzo beans. I must say that I really do prefer chickpeas to be organic from a can. They are at Cashwise in the health food section. They just come out looking better and I swear they taste better but be cheap if you must.

Peel 2 carrots.

I have this special little tool that my mother-in-law brought to me one time. I think it might be an "As Seen on TV" kind of product. It works wonders if you need to julienne something. I am sorry for sharing what you can't have. You can borrow this from me if you want to make the perfect carrot strips too!

I just run it down the carrot like you would a regular peeler but it gives you these very thin strips that are perfectly sliced. The carrot will get too thin to slice so then I finish it up by cutting with my knife. It is nice to have both sizes in the salad I guess.

But the knife just can't get them as thin as I like them. Maybe you could slice them quick in a food processor with the slicing attachment. Enough with the carrots, I know!

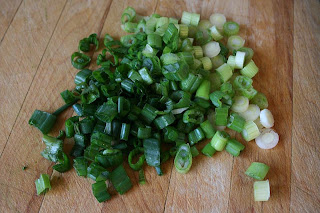
Dice up 3 green onions, 1/4 cup of cilantro, and 2 Roma tomatoes. I also think cherry or grape tomatoes would be great sliced up.

You need about 1/2 cup of feta cheese and a little more to top the salad.

The RAISINS! The original recipe did not call for these but my sister and my husband both think the raisins make this salad what it is! My sister claimed, "That salad is a completely different salad with the raisins.!" You need about 1/2 cup plus a little more to top the salad as well.

Mix all of these ingredients together gently.

For the dressing you need 3 Tbsp. olive oil, 3 Tbsp. fresh lemon juice, 2 tsp. ground cumin, 1/4 tsp each of sea salt and pepper, and a pinch of cayenne or use Franks Red Pepper Sauce. ( I was out) Mix together and pour over the salad. It is best if the flavors have a little time to blend which is why I made it this morning for lunch this afternoon.

Piece of advice: Don't substitute lemon juice from a bottle! Go get a fresh lemon before you make this. You very much taste the dressing on this salad and it won't be good with that bottled stuff!

It makes a beautiful salad and it is so delicious and unexpected. My friend Ann who asked me about this at the gym said, "Who knew you would like chickpeas?" When I served this to my friend Melissa for lunch one day my husband called me later to tell me that he was sick of hearing about my salad at work! (She works with Miles) I should have sent you with the leftovers that day Melissa!

Moral of the story is give it a try! I think you will be pleasantly surprised! I think one day I need to have a salad smorgasbord with all my favorite salads and invite a bunch of skeptics over for some taste testing. Sounds fun don't you think?

Recipe lightly adapted from March 2011 Clean Eating Magazine

Moroccan Chickpea Salad
2 cans chickpeas drained and rinsed
2 large carrots, peeled and julienned
3 green onions, thinly sliced
2 plum or Roma tomatoes, diced
1/4 cup chopped fresh cilantro
1/2 cup crumbled feta cheese
1/2 cup raisins

Dressing
3 Tbsp. Olive oil
3 Tbsp. fresh lemon juice
2 tsp. ground cumin
1/4 tsp. sea salt
1/4 tsp. black pepper
pinch of cayenne or Franks

Mix together gently in a bowl.  Whisk dressing ingredients together. Add dressing to the salad and toss. Top the salad with a bit more feta and raisins. Let sit for 30 minutes to allow flavors to blend.

FYI: The original recipe also calls for 1/4 cup chopped fresh mint and 1 red bell pepper diced. I leave these two things out every time because I am not a super huge fan of mint and I am just not sure about the red pepper being in there. Someday I will try it with those ingredients but for now I am just sticking with my excellent addition, the raisins!


Saturday, January 28, 2012

Cake for Breakfast?????

I just ate the best breakfast! It was fast, very healthy, fun, delicious, chocolaty, new, gluten free, and pretty much was like eating cake for breakfast with absolutely no guilt. Evan was very sad that he had poured himself a bowl of cereal after I gave him a bite so that means WINNER!

I found this recipe on a blog called "The Edible Perspective." That is the same place I found the recipe for french toast oatmeal that was so yummy. There are several versions of what Ashley has named Buckwheat Bakes, some microwaveable and some oven baked, but this morning I picked the Quick Cocoa Buckwheat Bake. I have been wanting to try these for some time but keep forgetting to pick up some buckwheat flour. Yesterday I remembered and this morning was bliss.

Can you believe this is completely 100% healthy? Can you also believe that I cooked it in the microwave in less than 2 minutes? Totally.in.love.

Totally simple to make too. Mix your wet ingredients; applesauce, milk, and vanilla together in a small dish.

Mix your dry ingredients together; buckwheat flour, cocoa, flax, cinnamon, a little Stevia if you wish and baking powder. I left the Stevia out of mine and it was just fine. Then add the wet to the dry and stir them up well.

Pour mixture into a greased ramekin. Mine is a bit of a larger ramekin. It is about 4 inches across and 2 inches deep. So use something similar to that size. Put this in the microwave for about 1:30 to 1:45 seconds.

Ta-Da! Magic healthy cake happens! But of course I couldn't leave it like this!

So I picked Barney Butter. This is Miles' favorite almond butter. He thinks it doesn't have as much oil and it is stick to your ribs good. It does have a great flavor but sadly I did have to order this online at OpenSky. I also picked walnuts for crunch and drizzled a little agave over it for sweetness. Brown rice syrup or maple syrup would also be divine!

See the lovely moist chocolate cake texture! Evan took a couple bites of mine and loved it which completely thrills me! This is fast enough to make every morning for breakfast, especially if I measure out the dry ingredients the night before, and it is super healthy.  Goodbye to cereal kids?? Plus with endless toppings and combinations it will be very versatile. I will try the vanilla and banana combination next. I should also add that is was very filling. That was the husband's comment not mine!

Word of advice: DON'T WAIT SO STINKIN' LONG TO MAKE THESE! I missed out by not picking up that flour weeks ago. I have a certain very picky friend who I think would totally love these! You know who you are!


Go on over to Edible Perspective Buckwheat Bakes for all the recipes. Some are microwavable and some are for the oven so pay attention to that!
Here is the recipe for the one I made today. The only change I made was to add a little Stevia to Miles' just to see the difference. Since these are made individually you can completely customize them!

Quick Cocoa Buckwheat Bake
  • 1/3c raw buckwheat flour [ground from raw groats] (just buy it ground)
  • 2t ground flax meal
  • 1T unsweetened cocoa powder
  • 3T unsweetened applesauce
  • 5T nut milk
  • 1/2t vanilla extract
  • 1/2t cinnamon
  • 1/4t baking powder
  1. In a small bowl, mix the dry ingredients together.
  2. Add in applesauce, milk, and vanilla and stir until smooth and just combined.
  3. Lightly grease a microwave safe bowl [mine is about 4-5” diameter], pour the batter into the bowl and evenly spread.
  4. Microwave for 1min 30sec – 2min.  [mine took 1m45s]
  5. Loosen the edges, flip onto a plate + pile on the toppings.
*In my older versions I always added 1T raw buckwheat groats + 1T chia seeds.  You can definitely do that here, but also add 1T extra milk.

Thank you Edible Perspective for making my day start with chocolate cake!! My belly is very happy!

Thursday, January 26, 2012

Whole Wheat Zucchini Muffins

Remember that bag of leftover zucchini I had from making stuffed zucchini last week........

Well it was time to use it today! I took it out of the freezer yesterday and let it thaw out in the fridge so I could make some muffins today.

I already had my food processor out so I decided to throw it all in there today but this works perfectly well by hand also. Toss in one egg and a teaspoon of vanilla and beat together or give it a whirl in the food processor.

This is what I use to sweeten these muffins so add 1/3 cup applesauce and 1/2 - 3/4 cup Stevia. If you use 1/2 a cup you may want to add a little agave or honey as well. Stevia can sometimes have a bit of an aftertaste so if that really bothers you then mix it with a bit of regular sugar. Toss them in your bowl with the egg.

I drained the excess water from the zucchini and then added it to the processor.

Since I was just dumping things in today I went ahead and added these dry ingredients to the wet and mixed them in. If you are mixing by hand you can mix all the dry ingredients together and then add to the wet.
Then add 1 1/2 cups of whole wheat flour. I have done a lot of experimenting with different types of wheat flour and I prefer this recipe to just be straight whole wheat flour, not pastry or white whole wheat. Toss this in and mix but be careful to not over mix if you are using the food processor.

If your batter seems a bit thick you may have drained off too much of the excess water from the zucchini so just add a bit of milk. I actually didn't have quite enough zucchini, making my batter a bit thick, so I added a bit of almond milk this time. If you are making these with the pecans or walnuts then stir them in at this point.

I decided to make these mini today for two reasons. The first is always the same and that is that people just like mini things better. If I made this a loaf I would bet a hundred dollars that I would end up throwing away the last 3 pieces. The second reason is that they cook much faster. Only 15 minute to deliciousness!

They puff up so nicely! I drizzled a bit of agave over the top of half of these before I cooked them just to see what would happen. It doesn't really make a difference though so drizzle some on afterwards while they are warm and right out of the oven.

Mmmmm...... and look the sun was shining through the window so my picture wasn't so dark and I could shoot in manual mode.

Now I am all ready for those munchkins when they come home from school and say, "Can I have a snack????" Well maybe I will be ready......that is if I don't eat them all before then. Two muffins down the hatch already and I am about to eat two more. I guess that is the one downside of making these mini. It is hard to stop eating them.

Whole Wheat Zucchini Muffins with Pecans
1 egg, beaten
1 tsp. vanilla
1/2 cup Stevia plus 1/4 cup Agave nectar or 3/4 cup Stevia
1 1/2 cups grated zucchini (squeezed, then packed into measuring cup)
1/3 cup applesauce
1 1/4 tsp. baking soda
pinch of salt
1 1/2 cups whole wheat flour
1 tsp. ground cinnamon 1/4 tsp. ground nutmeg
1 cup chopped pecans or walnuts, optional

Preheat oven to 350F. Grate zucchini by hand or using a food processor, then gently squeeze grated zucchini to remove some of the water. Measure 1 1/2 cups (packed) zucchini for this recipe, and if you have extra, freeze it for another time.

In a medium-sized bowl, beat egg, then add vanilla, Stevia and Agave and mix to combine. Stir in the grated zucchini, then the applesauce. Sprinkle baking soda and salt over the top of this and mix.

In a smaller bowl, combine whole wheat flour, cinnamon and nutmeg. Stir dry ingredients into the zucchini mixture, then fold in chopped pecans.

Spray muffin pan or loaf pan with non-stick spray, then divide batter evenly among cups to make 24 mini muffins or pour into loaf pan. Bake for 15 minutes for mini muffins and -30 minutes or longer for a loaf pan or until a toothpick inserted into the center comes out clean. Let cool then remove from muffin pan or slice loaf.


Tuesday, January 24, 2012

Stuffed Peppers

Hello faithful readers! I had a super fun time last week planning and making things for a friend's baby shower. We had such a great time together Saturday morning and I got some great baby snuggles in which always warms my heart! Needless to say I was a little tied up with those things and with making the cake for the shower so cooking and blogging took a back seat. I do a little cake decorating on the side and hadn't done a cake in quite sometime. I was a bit rusty I am afraid and so was my fondant! Time to order a new bucket. Here is the cake.
We had a little airplane theme going on. The sign says "Taking Flight." Please excuse the shadow in this picture. I took it late at night. You wouldn't think such a simple cake would cause me so much frustration! Like I said, time for new fondant!


So back to cooking right? Last night I made stuffed peppers for dinner and they turned out great. They are simple to make and I think you could make them several different ways so you didn't tire of them. I got out my mini food processor to save time and to save my eyes last night.

Chop up 1 large or 2 small onions by hand or in a food processor.
Cut off the tops of 6-8 peppers, remove any remaining seeds, and chop those up as well in a food processor. Add the chopped veggies along with a couple minced garlic cloves to a pan with a bit of olive oil.

Add a teaspoon of each of these spices to the pan and saute for about 5 minutes.

Clean the insides of the peppers out and give them a wash.

Place the peppers in a large pot and cover them with water. Boil them for 5 minutes then drain them and set them aside. This step really helps them soften up and cook to perfection in the oven later.

Last night before I sauteed the veggies I had cooked up my meat. I mixed half beef and half turkey to give these a bit more flavor this time. Usually I just opt for turkey.

While I was cooking my meat and getting all my other ingredients out and ready I had cooked a cup of brown rice also. Stir that in at this point.

Then you will need to stir in a large can of tomato sauce. And let this simmer together for 10 minutes or so.

I like to use this can of sauce because it has a fairly low sugar content. You could also choose your favorite spaghetti sauce as well.

Fill the peppers with the mixture and place some water in your baking dish. I added one cup of water to this 9 X 13. Again this just helps them soften and cook well so you can easily cut into them. Put them in a 350 degree oven for 20 minutes.

After 20 minutes take them out and top them with a little mozzarella cheese. Place back in the oven or under a broiler whatever you prefer until the cheese is melted. I put them back in the regular oven for about 7 more minutes.

I served them with some broccoli, salad, and fresh pineapple. A very veggie dinner indeed! My family loved these and even Evan who doesn't like peppers too much said he liked them. Faith on the other hand is sick again and she slept right through dinner. I am sure it didn't hurt her feelings that she missed this meal.

Suggestions: Next time I will add a little cayenne or Franks or chili powder. It just wasn't spicy enough for Miles. It was fine for me though!
Experiment with the filling and swap out the rice for some quinoa or leave out the meat all together and just have a vegetarian meal. Perhaps some couscous would be good in there as well.
Don't skip the cheese! The recipe I used didn't call for it but luckily I was thinking last night.
I had plenty of extra filling, which I will put to good use, but it would have been nice to have used 8 peppers instead of 6.

These were even better for lunch today after the flavors had time to meld together.

Now I am really sick of sick so I must get ready to take my daughter to the doctor. I think she might have some kind of intestinal infection that I am really hoping an antibiotic will take care of. I hate these words...."It's just a virus! Let it run its course."

Here is the recipe.

STUFFED PEPPERS
6-8 medium size green peppers
1 pound ground turkey or beef or a half/half mixture
1 large onion finely chopped
1-2 cloves garlic minced
1 (29-ounce) can tomato sauce
1½ cups cooked brown rice
1 tsp. dried marjoram
1 tsp. dried oregano
1/8 tsp. salt
¼ tsp. pepper
Mozzarella cheese – enough to sprinkle on top of each pepper

1. Cut off the tops of the peppers. Remove and discard seeds and membranes. Cook pepper cups in boiling water to cover for 5 minutes. Drain peppers and set aside.
2. Finely chop pepper tops, discarding stems, and the onion. Mince garlic and add the veggies to a pan with a bit of olive oil. Add marjoram and oregano and sauté for about 5 minutes.
3.  In another pan brown the meat and drain. Then add to your veggies. Add the rice and tomato sauce and stir to combine. Bring to a boil, reduce heat and simmer, uncovered, for 6 minutes, stirring often.
4. Spoon meat mixture into the pepper cups and place in a baking dish. Add hot water to the dish to depth of ½ inch. Bake uncovered at 350 degrees for 20-25 minutes.
5. Remove from oven and top with cheese. Place back in oven until cheese is melted and golden. About 5-7 minutes.

Tuesday, January 17, 2012

White Chili

This chili is one of my all time favorite things to make and eat. In fact when we drastically changed the way we eat I was thinking how sad it would be to give this up. Then I got smart and looked at the recipe and realized I didn't have to give it up! It only needed a little tweaking. It isn't exactly a low calorie food with the cheese and beans but beans are quite good for you so I think this is a great recipe to use when you just need a little comfort food.

Guess what else? One. Pot. Meal. My very favorite kind of meal! So lets go in order so you can see how easy it is to just dump it all into the pot.

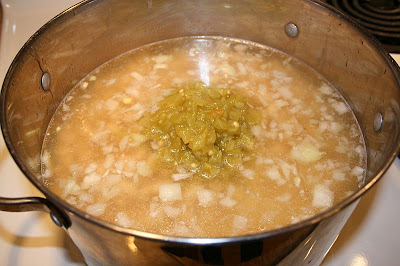
 Start with 2 onions chopped and 3 cloves of garlic minced and saute them in some olive oil for a couple minutes.

Add approximately 49 oz. of chicken broth. You can buy a can that size. I had an opened carton in the fridge and one other 32. oz carton so it was approximate.

Add one 7oz. can chopped green chilies and 6 cans of Great Northern Beans that have been drained but not rinsed.

Add 1 tsp. oregano and 2 tsp. ground cumin. Give it a stir.

While the pot is simmering grate an 8oz. brick of reduced fat pepper jack cheese. I like to do this on a paper towel so I can pick it up and dump it all in the pot. I had slow boiled 4 chicken breasts earlier in some garlic powder, salt, and pepper, and shredded them up also while the pot was simmering.

Add the chicken to the pot. Give it another stir. Let it simmer another 15 minutes or so. At this point I removed a bowl for each of the kids. They don't like pepper jack and I must admit it is a little spicy for the young ones. About 5 minutes before you are ready to serve this stir in the cheese.

Sit down and enjoy this delicious bowl of comfort with a salad on the side and no guilt. Just about anyone will love this recipe. Finish your bowl and celebrate that you only have one pot to clean up. Tonight I didn't even clean up my pot. I stuck the lid on it and put it in the fridge after it cooled down a little! Hooray for easy meals and easy clean up, right? Keep in mind that this makes a very large pot of chili so you may want to cut the recipe in half. Also if you like your chili a little thicker you should use less chicken broth. I love this without the sour cream so I rarely use that option but it helps to thicken the chili up as well. Enjoy!

Comment from my son tonight, "Thanks for that very delicious meal mom!" Those kinds of comments make all those dirty diapers I changed worth it! Love that kid.


White Chili
4-6 chicken breasts simmered on low so they don’t get tough. Shred when done
2 onions chopped
1 extra large can chicken broth (49oz.) low sodium
2 garlic cloves
6 cans Great Northern beans drained but NOT rinsed
2 cans chopped green chilies (4oz. cans)
2 tsp. cumin
1 tsp. oregano
2 cups reduced fat pepper jack cheese shredded
Salt and pepper
Olive oil
Light sour cream (optional)

In a large pot, sauté onion and garlic in a bit of olive oil.  Add chicken broth, cumin, oregano, beans, and chilies. Bring to a boil and simmer about 15 minutes. Add chicken, cheese, and salt and pepper to taste. Simmer until the cheese melts, about 5 minutes.  Before serving add ½ cup sour cream or just add dollop on each bowl.