Monday, November 21, 2011

Bruschetta Quinoa Salad

At 5:15 last night I looked in the fridge to see what I could fix very quickly. We had to leave for the Thanksgiving service at church by 5:45 and I still had to cook, eat, and get Faith looking a little less disheveled. So this is what I found in the fridge.

Left over quinoa, which I have often in the fridge, and some bruschetta.

I thought to myself, "I bet I could mix those two together and heat it up for a pretty tasty dinner. I bet I could throw in some spinach too for something green and maybe top it with some cheese." When I opened the fridge to get some mozzarella I saw the chicken sausage sitting there. Hmmm....that would be good in there too.

And very delicious it was! I was so sad when I got to the end of this bowl but very happy I have discovered yet another way I love to eat quinoa. Plus I whipped this meal up in under 5 minutes! Awesome and filling!

Bruschetta Quinoa Salad for One
Approximate Measurements:
1 cup cooked quinoa
1/2 cup bruschetta
hand full of spinach
one chicken sausage sliced and cooked
1/4 cup mozzarella

P.S. I bought the bruschetta at Sam's but I am sure you can find something similar at the grocery store.

Now back to menu planning and cleaning. Hopefully later today or tomorrow I can share some of my healthy plans for our Thanksgiving meal.

Post Publish Update: I have since made this salad for several occassions and so many people have loved it and asked about it. I thought I sould update the recipe for a bigger version.

Bruschetta Quinoa Salad for More
1 1/2 -2 cups dry quinoa, rinsed and cooked (will make 5-6 cups)
1 container of bruschetta (around 20-24 ounces)
1-2 cups spinach loosely packed
4-5 chicken sausages diced and cooked
1/2 cup fresh mozzarella or parmesan (plus more to top if desired)
1/4 cup balsamic vinegar
optional: add in an additional diced tomato or two and some Italian seasoning.

Note: I usually cook the quinoa in chicken broth for this salad instead of water. Two cups dry quinoa can be a little much depending on how many people you need to serve. Sometimes I reserve out a cup or so of the cooked quinoa for other things.


Saturday, November 19, 2011

Peanut Butter and Banana Agave Smoothie

It's been snowing all day. I meant to take a picture of it today but it is now dark and I can't. I don't love the snow. I really, really, don't know why I live in Minnesota where winter lasts 6 months???? Although it is beautiful, it was a little depressing as I watched it fall today knowing that it will probably be here until March. It is hard to believe it was just yesterday morning that Miles and I had perfectly, lovely, sun-shiny weather for our run. It has been nice that it held off this long though and we've had a nice long Fall.

I decided a little comfort food dinner was necessary to ease my troubled winter mind. I had plans to make a soup and homemade oatmeal bread but when I went to the cupboard I had no stock. So on to plan B. Kodiak Cakes and smoothies sounded good and I have had this little magazine clipping for the smoothies sitting on a shelf for weeks waiting for me to try it. It did NOT disappoint! Plus it would be a quick dinner since I have been painting again for most of the day!

This is what went into the smoothies tonight. Notice they are sugar free!! Of course there was some ice too but you don't need a picture of that. They were AWESOME! I mean really truly yummy! It was a nice change from our usual berry smoothie.

In case you forgot what Kodiak Cakes are here is a picture of the box. I love that you only have to mix them with water. Even though they are a little expensive you don't have the extra ingredients like milk and eggs so it all evens out. Plus I love the ingredients list which includes 100% whole wheat flour and oat flour. They are quick!


We also had these Morning Star Farms sausage links tonight. I love Morning Star products. I love all the burgers. Every flavor is delicious. I will admit that they have a few more ingredients than I usually like in my food but they are convenience food for us and everyone needs a little of that in their life. They are meat free products and they have vegetables hiding in there which is great for the kids too. Give them a try sometime. I suggest starting with the Griller's Prime burger. These are a little expensive but in comparison to the drive through, not so much.


Mmm, mmmmm, good! Now you know me by now. I usually don't measure when it comes to things like this because I think it is pretty hard to mess it up but for those of you who need it I will give you a recipe to start with. I think you will find yourself tweaking it a little bit also to your taste preferences.

Peanut Butter and Banana Agave Smoothie
1-2 ripe bananas
1/2 cup Greek yogurt
2 tablespoons Agave Nectar
1/2 cup Vanilla Soy Milk or regular milk is fine too
1/4 cup creamy peanut butter (be generous)
1 tray ice cubes
1/2 teaspoon vanilla extract

Place all ingredients in the blender and mix well until smooth.

Tips: You can use plain or vanilla yogurt as well but this is a great place to throw in Greek yogurt and get the extra protein without added sugar. Since I used vanilla Soy milk I didn't find I needed the vanilla extract. If it isn't sweet enough for you toss in a little more agave or some Stevia. If your smoothie is too runny add the second banana and some more ice to make it a little thicker. I used 2 bananas for sure and about 4 more ice cubes. Enjoy!

I want to fall into bed right now and it is only 7:30. Too bad my house is a total pit and I need to clean my bedroom up so I can even sleep! I have issues like that. No dishes in the sink, no closet doors open, no mess in the bedroom, or there will be no sleeping. I know. I need therapy.

Friday, November 18, 2011

Turkey Meatloaf with Tzatziki

Today is my 50th post and I wanted it to be something kind of fun or new and exciting but I am all out of creativity so turkey meatloaf is what you get! Just when I got the living room cleaned up we totally destroyed it again today painting new closet doors and laying out the wainscot pieces so they can adjust to the climate in here. Ugh! The projects are never ending. I need to be planning Thanksgiving dinner instead of working on the house! So I stopped for a little bit to throw some dinner in the oven.

I made this Mediterranean turkey meatloaf on Tuesday evening to take to a friend who just had a baby. I left some things out because I was also busy making some cake pops for them and I lost my brain. I hate it when recipes don't turn out the way you expected. I needed to redeem myself plus this is a throw it all in the bowl and mix it up meal, my favorite of course!

This is what I forgot on Tuesday so it went in the bowl first tonight, one chopped up onion. I used a medium size sweet onion.

Next add 3 cloves of garlic. I hate peeling garlic so I just stick it in the garlic press like this. This is a Pampered Chef garlic press but I bet you could do it with any press. Sometimes I smash the garlic with the back of a big knife to get it out of the peel.

Next I chopped up a couple tablespoons of fresh Italian parsley.

Now I know some of you will be opposed to the ground turkey but you need to make the switch especially if you are trying to lose weight. I usually buy ground turkey breast or something even leaner than this but I was feeling cheap and I needed two pounds. Tuesday night when I made it for someone else I mixed it with beef. That is a great way to start getting used to the taste if you are a little skeptical. You could also mix it with ground pork. I would start with a 50/50 ratio.

Then into the bowl went a little salt and a generous amount of pepper to taste, about a tablespoon of this Greek seasoning, and about 1/2 tsp. of thyme. If you don't like thyme just leave it out or use oregano or basil. (any Greek seasoning will do)

This is two pounds of Jennie-O turkey not just one like the picture above. I wanted enough for left overs tomorrow. Mix all the ingredients together gently with your hands in a bowl. The key to good meatloaf is not to over mix it. If you want it to stick together a little better you could also add some egg. I don't mind that if falls apart a little because I like to slice it up anyway and let the sauce fall through the slices.

I like to shape mine into 8 individual meatloaves but you can put it in one longer loaf pan. You will need to adjust the cooking time for sure. Put them on a foil lined tray and into a 350 degree oven for about 25 minutes or until internal temperature reaches 165. You can also pan sear them in some olive oil on each side for a few minutes before putting them in the oven to give them some extra flavor and speed up the cooking process a little. It also helps them hold together a bit better.

I like to slice one open and check for doneness which is a great reason to make them mini. They also cook much faster than a whole regular meatloaf.

Tonight I served it with a little kale I cooked with some olive oil and white wine vinegar, sliced oranges, and Joseph's pita. I always top this meatloaf with Tzatziki sauce. It makes it so delicious and better for you than a sugar loaded barbecue sauce or ketchup. Usually I slice the meatloaf up and let the sauce drip down between.

To make the Tzatziki which is a traditional Greek dip, dice up half a cucumber fairly fine. You don't want big chunks of cucumber in your sauce.


Add the cucumber to a bowl with 1/2 cup Greek yogurt and 1/2 cup light sour cream. Make these scant 1/2 cups. I also toss in a little more Italian parsley, 2 cloves garlic, salt, and add about 1 tsp. of dill. I would LOVE to add more dill but Miles hates it so it has to be mild. It is best if you can let this chill for a while so the flavors can blend. It is also awesome to dip your pita in but so was the homemade hummus!

There you have it. My oh so creative 50th post. Maybe something like peanut butter and banana smoothies would have been better! Back to the painting I go!

Recipe
TURKEY MEATLOAF WITH TZATZIKI SAUCE
2 lbs. ground turkey
One small-medium onion chopped finely
2-3 Tbsp. Italian parsley
2-3 garlic cloves
½ tsp. thyme (oregano or basil work also)
½ tsp. salt
1 tsp. black pepper
1 tbsp. Greek seasoning
Mix all ingredients together gently with hands or wooden spoon. Do not over mix. Form into 8 small loaves. Place on foil lined baking sheet. Bake at 350 degrees for approximately 25 minutes or until internal temperature reaches 165 degrees.

SAUCE:
½ cup plain or Greek yogurt
½ cup light sour cream
2 garlic cloves
½  tsp. salt
2 Tbsp. chopped parsley
Half of a cucumber finely chopped.
Mix all ingredients together and chill for flavors to blend. Serve over meatloaves or slice meatloaf in thin slices and place in a pita with sauce.


Tuesday, November 15, 2011

Sugar Free Chocolate Bar

I've had a busy day today grocery shopping, running errands, and making a meal for some friends who just brought their precious new born son home from the hospital today. Little Aidan is such a priceless treasure and it is so exciting because it has been a long journey getting him here! So I am out of time and this is not a real post. Just something that I feel the need to share. When you discover something really good you should let other people in on it, right?

Well last week I found the most delicious sugar free chocolate bar. I don't know why I was even looking at the chocolate bars. I guess a woman doesn't really need a reason now does she. I picked it up and flipped it to the back like I always do to read the label. My eyes scan quickly until I find the sugar content. What? Zero grams? How is that possible? Especially since all the other dark chocolate bars have like 20 grams. I flip it back to the front. Yep, there it is at the top, Sugar Free. Hmmm....this might be calling my name. I flip it back over to look at the ingredients list. Hooray! No aspartame! It goes into the cart. I pay for it and take it out to the car before I rip it open to check it out. WOW! It tastes pretty darn good.

I start to drive away. I consider whether or not I will share or even let Miles in on this little secret. He does love chocolate too. I will admit you must have some inclination towards dark chocolate or you might not be as thrilled as I am. I eat several squares before I finally tell him about it. He too is amazed at how delicious it is. He is a dark chocolate lover.

I come back the next day to eat a little square and what do you know that is about all that was left! Perhaps I shouldn't have shared after all!

Why didn't I buy another one when I was there today?

Don't let the star anise ingredient scare you away. Miles hates anise and he didn't even notice it. It probably adds to the over all flavor but you can't taste it in there alone. You can taste a little of the espresso however and that is why I loved it so much!

These bars are near the good chocolate in the candy aisle. You could make an awesome chocolate sauce or ganache with this also but you can just eat it when you need a chocolate fix. I kind of need one now which makes me even more bummed I didn't pick another one up today. I am having to avoid the temptation of these....

I made cake pops today for the dessert part of the meal I delivered. Cake pops are for celebrating special occasions you know and they are a total weakness for me. There isn't much on earth that tastes better than them. I have made them tons of times in all kinds of shapes and colors but have never taken a picture of them. Strange.

Now I must go watch last week's episode of the biggest loser or I will be behind again since it is on tonight too! I hear last weeks episode was awesome!


Monday, November 14, 2011

Sun-Dried Tomato and Feta Chicken Roll Ups

Well I am home from a very fabulous weekend with my girlfriends scrapbooking! We go on this trip annually and it is where we get the bulk of our scrapbooking done for the year. I completed 50 pages! Together we finished 218 pages and we are pretty proud of ourselves. We also eat way too much on this trip. They make it easy for us by providing such delicious meals and snacks. The problem is we are too sedentary to really need that much food and there is a small issue with a lack of vegetables for me. (I forgot my V8 this year.) Don't get me wrong, I am not complaining in the least. I loved the Saturday morning breakfast of oatmeal and yogurt with all kinds of fruit toppings and brunch yesterday was a delicious egg bake. We also had sandwiches on homemade bread, taco salad, and chicken cordon blue. The highlight of the trip comes Saturday afternoon when they do the cheesecake parade. That is right, a parade for cheesecake!


We all stand up and clap to some very fun music as he parades his cheesecakes around. Then they go cut them up and we go enjoy! I picked pumpkin and a slice of green grape cheesecake. They are small slices so no worries. There are SO many different kinds it is hard to choose.

Here we are Friday night just getting started really!

Needless to say after a weekend of indulging and a lot of sitting I came home feeling pretty stuffed! Since Miles was home with the kids by himself all weekend he didn't do too much cooking either. It is possible that no one ate a single vegetable all weekend long. So we declared today and probably tomorrow to be a phase one kind of day. By that we basically mean no carbs, no sugar, and no fruit. We will then eat fairly strict the rest of this week with limited carbs and fruit but still no sugar. That's the problem with indulging too much! You can do it for a couple days but then you have to be strict for several days to even things out.

So tonight I made a little invention. Even though we will be eating strict I still want my food to taste great and feel like it is something special. I made a sun-dried tomato paste tonight that I rolled up inside some chicken breasts. Miles' words, "Oh my gosh! Did you write this one down?" I think we have a winner folks!


First place some sun-dried tomatoes in a bowl of water to soak. I used about 1/2 cup of julienned tomatoes. Next you need to pound your chicken breasts flat with a rolling pin or mallet and set them aside. The recipe for the filling will do about 4 chicken breasts. You could probably sneak out a fifth if you needed too.

Give the tomatoes at least 10 minutes to soak and then grind them up with a little of the water. To this I added 1/4 cup of feta cheese, 2 tsp. of chopped basil (jarred), one tablespoon each of balsamic and olive oil, and 3 garlic cloves minced.

It was having a hard time getting chopped and mixed well so I took it all out and microwaved it for 30 seconds then gave it a few more whirls in the food processor. It came together nicely after that. I also added a bit more feta at this point.

Spread it generously over your flattened chicken breast.

Then roll up the chicken starting with the most narrow end and place some toothpicks in to hold it in place. Put in a pan seam side down and cover with aluminum foil. They go into a 400 degree oven and cook for 30 minutes. I decided after eating them that a couple minutes less would have been perfect! They weren't really dry but they weren't super moist. So just watch them closely.

While my chicken was cooking I did my favorite trick with green beans. I had already steamed them in the microwave for 5 minutes. Then I put them in a pan with some olive oil, a little chopped red onion, red wine vinegar (be generous), and sliced almonds. Saute them for about 5-7 minutes.

I sliced up the chicken and served them up with the green beans and some salad. Remember we are eating strict so we needed to have 2 vegetable servings tonight. I don't mind though. I was vegetable deprived. I ate salad for lunch too. It felt good to be back to my normal diet. My body is really thankful too! I also think that these would be great just smothered in the sauce if you don't want to take the time to roll the chicken.

Even though I have to eat strict the next few days it is worth it and this is why. My little girl poured over her completed pages for quite some time last night. Her brother was equally thankful and excited to see his pages too. Portion of goodness, you bet!

I think now I will have some hot tea and catch up with the DVR. It has been a while and we miss each other!

Recipe:

4 chicken breasts pounded flat
1/2 cup sun-dried tomatoes soaked in water
1/3 cup feta
2 Tbsp. chopped basil (I used jarred but fresh is good too)
1 Tbsp. balsamic vinegar
1 Tbsp. olive oil
2-3 cloves garlic, minced

Directions:
When tomatoes are soft, drain the liquid reserving 1/4 cup, and place in a food processor. Chop up finely with the liquid. In a small bowl place the rest of the ingredients listed (except the chicken) and add the tomatoes. Microwave for 30 seconds and put all ingredients back into the food processor. Spin until mixed well.

Spread a generous amount over each chicken breast. Roll up starting with the narrow end and insert toothpicks. Place seam side down in baking dish and cover with aluminum foil. Bake for 28-30 minutes at 400 degrees. Slice and serve immediately.

Friday, November 11, 2011

My Mom

Today marks two years since my life changed forever. My Mom went home to be with the Jesus she loved so much. Given she had cancer you would think that it didn't come as a surprise when my sister called me to tell me what was going on, but it was quite unexpected. She had just declared to us that she was done with treatment and that I should come home to Spokane so we could get some things figured out. She died two days later. While I would give anything to be able to talk to my mama again, in hind sight my sister and I are both grateful that she went quickly and didn't have to suffer a long, drawn out, painful death from bone cancer.

I miss my mom everyday! Some days I still find myself thinking I can pick up the phone and call her. I especially miss her around my birthday because only your mom can call you and tell you about the day you were born with great detail. She taught me lots of things but most importantly she is the one who shared Jesus with me and showed me what it means to have a relationship with him, especially in her last few months. She taught me a few things in the kitchen too. I think some people would find that hard to believe. My mom didn't cook often but when she did it was very good!

I love this picture of my mom in her kitchen, circa 1970. I think she was beautiful. I keep this in my kitchen along with a picture of my grandma cooking in her kitchen.


This was taken in March of 2009 when she came to visit us in Minnesota. I was very proud of her for allowing us to take a photo of her. She HATED her picture being taken. I am super glad I have this memory. She spent a fairly quiet week with us. I did lots of cooking for her which she raved about like only a mother would! I took her to get pedicures, do shopping, and have lunch that day in St. Cloud. Fond memories.


In honor of my mom today I thought I would share about one of her favorite snacks that has surprisingly become one of my favorite snacks. I find this very ironic because as a kid I could not understand how she could polish off a can of these in no time flat.

I am guessing her can didn't say wholesome or nutrition on it but she loved the mix with cashews in it. I thought nuts were disgusting back then. I can't live without them now! Funny how we become more and more like our parents as we age no matter how much we said we wouldn't as teenagers! I am happy to have any ounce of my mom left in me now. She was an amazing woman. I think I realized it too late.

Now polishing off the whole can in one sitting like my mom used to do I would not recommend! Nuts do have a lot of calories in them. But they are very good for you! They get me through the day. I love all kinds. A bag of soy nuts or cocoa roasted almonds often travel with me in my purse. Contrary to popular belief I do eat a lot. I get hungry between meals and nuts are the perfect thing to snack on.

In fact we have a nut/trail mix jar on our shelf instead of a candy jar. Sometimes I still need someone to help me keep my hand out of the jar though!


Nuts have no sugar which I love! They are full of heart healthy unsaturated fats which can help lower bad cholesterol. They can help reduce blood pressure, and many claims have been made to nuts preventing weight gain and actually promoting weight loss. The fat, protein, and fiber in nuts keep you feeling fuller longer so you eat less during the day. Nuts help people feel less deprived when watching what they are eating and have even been shown to help reduce type 2 diabetes. Perhaps my favorite thing about them is that they burn belly fat! Belly fat is the most unhealthy fat to have so if we can eat something we love and burn that fat away then pass the nuts!

I am leaving today for my scrapbook retreat. I was gone on this trip the weekend my mom spent in the hospital two years ago and I got the news when I came home. So today is a hard reminder that she is gone. However, it is also just another way to honor what is left of my mom in me. She was the queen of all things crafty! I do mean QUEEN! The fact that we will be having a cheesecake parade tomorrow evening helps me just a little too.
Yes I will indulge in a piece of cheesecake! There is a time and a place and this it!


Here is the four of us last year ready to go home. We are looking a bit tired wouldn't you say? Staying up until 1am is hard for me in my old age! I think we will snap a picture when arrive this year! Notice there was snow all over!!!!

Just one more thing about my mom and this disease. Cancer is a bad thing. It robs people of so much. It is scary and unpredictable. It is frustrating. It is something I know too much about and I don't even want to know about it. After my sister was diagnosed with ovarian cancer last year I was encouraged by my doctor to meet with a genetic counselor. I spent two hours learning about how cancer happens. Do you want to know the best defense you have against it and how to best protect your DNA from damaged cells which cause it?  No surprise..........DIET AND EXERCISE! That is the portion of goodness I am left with in regards to the dreaded awful disease. It is a deep source of motivation for me. I think of my mom often when I am fixing a healthy meal now and say to myself, just one more step in the right direction!

I am off to protect myself now with a good morning run before I am pretty sedentary for the weekend!

I love and miss you mom!

Thursday, November 10, 2011

Black Bean and Butternut Squash Burritos

I finally made these black bean and butternut squash burritos! I am proud of myself for finally getting to it, especially on such a busy night. I have been a single parent all day with Miles in the Cities for a conference and I am leaving tomorrow for my scrapbooking weekend with girlfriends. My to do list is a mile long! But one less task exists now. Accomplish one very delicious dinner, check!

This recipe came from a blog I love to read. It is a vegan blog and although we are not vegans there are a ton of good recipes on her site. I have tried several and not been disappointed. You can click here for Angela's recipe and beautiful pictures of how she made this dish. I only changed the cheese.
You must start by roasting a butternut squash in the oven for 45 minutes. Peel it, dice it up, then cover with olive oil and salt and pepper. I am not usually a butternut squash fan. I like all kinds of other squash but for some reason this one hasn't been my favorite. It has redeemed itself tonight however.

While the squash is roasting, you can cook your brown rice. They will finish about the same time. Here is a tip for the rice. If you want fluffier rice then rinse in a fine mesh sieve like this one first. I just put the rice in and run it under the faucet for a bit stirring it around until the water runs clear.

Next you need to chop up some onion and red pepper. Here is another tip that my Mama taught me long ago for cutting up an onion.

Cut down into the onion about and inch or two in lines all the way across and then flip the onion around and cut down into it the other direction.
Then stand the onion up on its side and slice down. You will get very even and finely diced pieces. I get about 3 slices out of this and then I repeat the cutting process. It is very handy and much quicker then trying to dice them up all evenly. Plus, less tears!
Add that nicely chopped onion to a pan with some olive oil and garlic and saute for about 5 minutes or so. Then you will add 2 tsp. of ground cumin, some sea salt, and a dash of cayenne pepper. More if you like it but I was feeding kids!
Add the red pepper first and let it saute just a couple minutes. Then you can add one can of drained and rinsed black beans and the rice. Let it heat up a bit. Turn the heat to low if you are still waiting on your squash to finish.
I took about 1 1/2 cups of the squash right out of my dish and put it into my pan. I did not wait for it to cool down. I then mashed it up with a fork as I stirred it into the bean mixture. I did end up adding a bit more just because it looked like I needed to.
Sorry for the darkness of this picture but I wanted to make sure and show you that I did add the cheese and Angela was right. You do not want to skip this step. I used a blend of Italian cheeses. She used a vegan cheese called Daiya. I didn't have quite enough of this left so I added a bit more mozzarella and stirred it in.
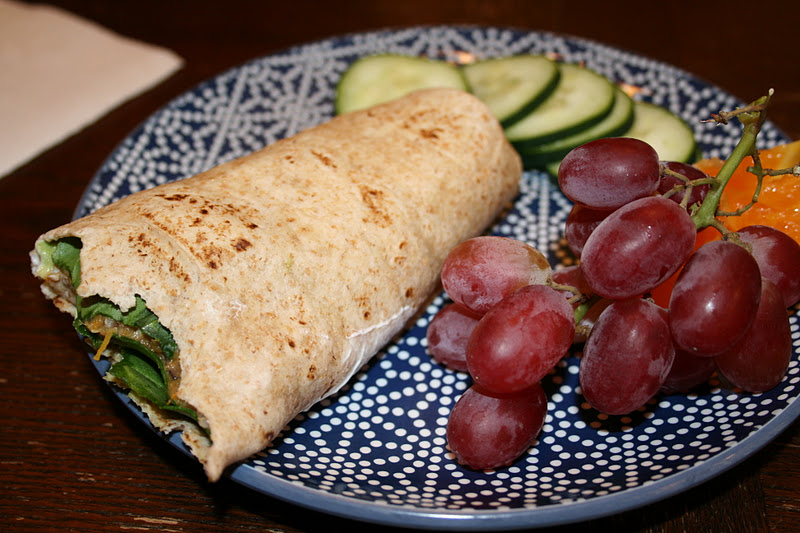
I did my little steaming trick for the tortilla. I get it slightly wet with my hand and then put it in the microwave for 20 seconds between two paper towels. It really stays moist that way and makes it easier to roll up. You can see that I added some spinach, sliced avocado and a bit of light sour cream. You could skip the sour cream but I wouldn't skip the avocado! Yummy!
I couldn't even wait until I sat down to take a bite. Pathetic I know but I had already tasted the mix from the pan and I just knew it was going to be one stellar burrito!
I was right! If I wasn't so full I would be having another one. Thankfully there is enough left for me to have some for lunch tomorrow before I leave. It will keep me full until dinner time tomorrow night for sure!

Now before I give you the recipe I must say a couple things. First, this is a burrito I would serve to ANYONE! I mean picky men or children, people who hate healthy food or whose tastes buds are fried, or people with squash aversions, small group people, or just regular people too. Sometimes I make something and know that while we make like it other people will not. This is something EVERYONE should try! The squash doesn't really taste like squash in there. It adds so much flavor. I can't wait for Miles to get home and try it! So trust me and let me know if you do make it!


Recipe from Angela Liddon at http://ohsheglows.com/
Ingredients:
  • 1 medium butternut squash, peeled, cubed, & roasted
  • 1/2 cup uncooked short grain brown rice (yields: 1.5 cups cooked)
  • 1 cup chopped sweet onion
  • 2 garlic cloves, minced
  • 1 red pepper, chopped
  • 1 tsp kosher salt, or to taste
  • 2 tsp ground cumin, or to taste
  • 1/4 tsp cayenne pepper, or to taste
  • One 15-oz can black beans (about 1.5-2 cups cooked), drained and rinsed
  • 3/4 cup Daiya cheese (I used a blend of 5 Italian cheeses)
  • 4 tortilla wraps (large or x-large)
  • Toppings of choice: (avocado, salsa, vegan sour cream, spinach/lettuce, cilantro, etc)

1. Preheat oven to 425F and line a large glass dish with tinfoil. Drizzle olive oil on squash and give a shake of salt and pepper. Coat with hands. Roast chopped butternut squash for 45 mins. or until tender.
2. Cook brown rice (for directions, see here)
3. In a large skillet over medium-low heat, add oil, onion, and minced garlic. Saute for about 5 minutes, stirring frequently. Now add in salt and seasonings and stir well.
4.  Add chopped red pepper, black beans, and cooked rice and sauté for another 10 mins. on low.
5. When b’nut squash is tender remove from oven and cool slightly. Add 1.5 cups of the cooked butternut squash to the skillet and stir well. You can mash the squash with a fork if some pieces are too large. Add Daiya cheese and heat another couple minutes.
6. Add bean filling to tortilla along with desired toppings. Wrap and serve. Leftover filling can be reheated the next day for lunch in a wrap or as a salad topper.