Wednesday, October 31, 2012

Spaghetti Squash Au Gratin

Oh Pinterest! I hadn't let myself join because I knew it would be a time kill for me. But temptation seized me. If you know me at all Pinterest is totally me! Everything you love and that inspires you all organized by categories onto neat little boards that I can refer to at any point. Totally me. My organized brain is in total love. Why the rambling about Pinterest? Because that is where I found this wonderful recipe that has been quickly bumped to the top of the list of favorites!

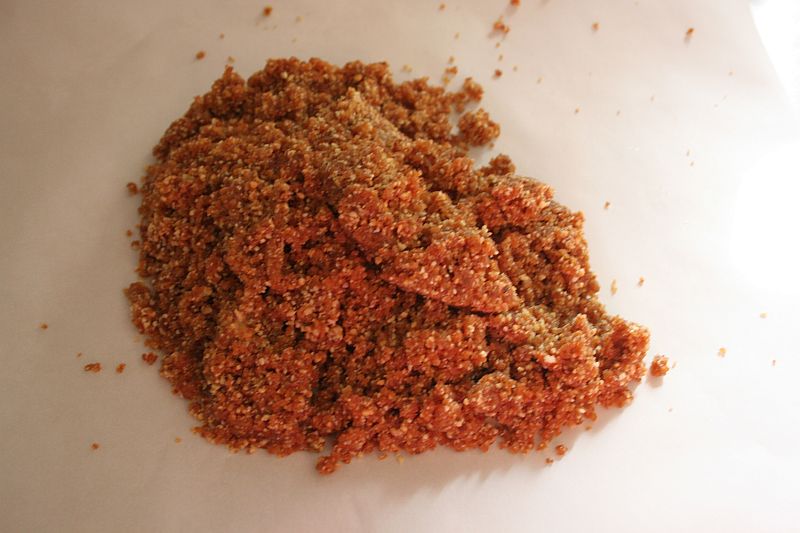
I cooked my spaghetti squash first and shredded it onto a plate. For instructions on how to cook it see this link. Cooking Spaghetti Squash The Pinterest recipe said to cook it in the microwave. My problem was that I don't have a dish that would fit the squash and still fit in the microwave. So plan on the 40 minute cook time if you have that problem or make the squash a day ahead.

I cut up two smaller onions and sauteed them in 2 tablespoons butter. I actually used real butter this time. Use whatever you like. Olive oil works great too. I also added a dash of cayenne pepper to the onions. I had to go easy on that for my sake and the sake of the children I was trying to make love this dish!

Cook them until they are starting to brown. I wish there was such a thing as a smell button. I love the smell of onions cooking.

I did make a few changes to the original recipe. I used 1/4 cup sour cream and 1/4 cup Greek yogurt instead of all sour cream. Not only do I love the tang it gives but it has more nutrition. Go for all yogurt if you dare!

I also changed the cheese. I used reduced fat marble jack and mozzarella which is naturally lower in fat. The recipe said 1/2 cup cheddar but by the time I topped it off with a little more cheese is was closer to one cup. The less you use the better of course for your waistline which is another good reason to use reduced fat.

I mixed the onions, yogurt, sour cream, and most of the cheese along with some parsley into a large bowl and stirred it around. The recipe called for thyme but I do not love thyme so I picked parsley but rosemary would be good too. A dash of salt and pepper at this point is adviseable also.

Place that in a dish to bake and spread evenly. I used my Pampered Chef round baker but a 2 quart casserole would be about the right size. Don't forget to top this with a little more cheese at this point.

I baked it for 20 minutes at 375 degrees. I wanted to let it get a little more crispy on top but I was in a hurry because Miles had to leave to speak at a meeting. I will do that for sure next time or just increase the temperature. My oven has issues.

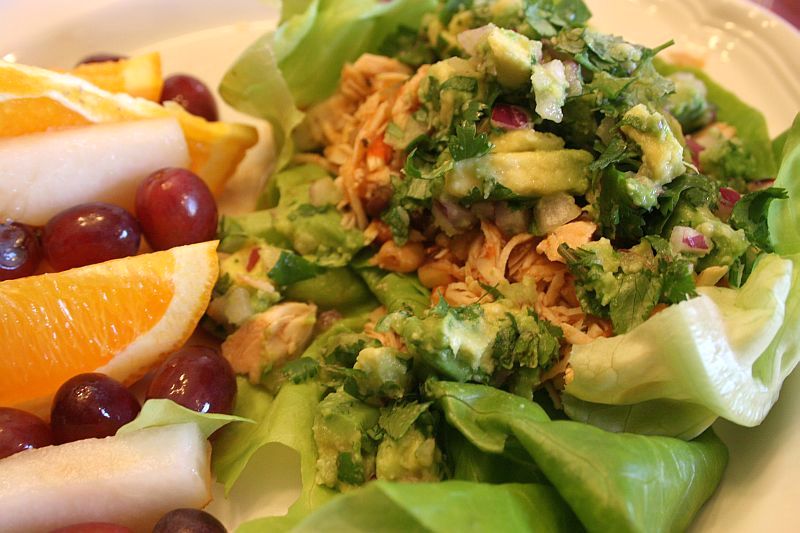
We had french cut green beans and some raw veggies and hummus on the side. Being that our main dish was also a vegetable this was one very veggie night! We are eating phase 1 of South Beach for the next week at least and maybe into a second week. We have had way too many social engagements and taken too much liberty so we both need to sugar detox again and take off a few pounds!
 But...............
if we weren't in phase one some kind of nice crispy topping would be awesome on top of this. I am thinking some whole wheat bread crumbs would be divine. But we are totally in love with this new way to eat spaghetti squash even without the crispy top.

I think spaghetti squash is becoming a Halloween tradition. I made this last year on Halloween night.

We loved it served like traditional spaghetti also but Au Gratin is better!

I must go turn my little girl into a kitty and my kick my big kid off the video games so he can dress himself as a musician gangster. He looks more like a musician than a gangster to me. But the fact that he is wearing any costume is good enough for me since he hates costumes! He also hates carving pumpkins but Faith and I do not!


Spahetti Squash Au Gratin

1 spaghetti squash cooked and shredded
1 large onion or two small, diced
2 Tbsp. butter
dash of cayenne
1/4 cup sour cream
1/4 cup Greek yogurt
1 cup reduced fat cheese (such as marble jack, mozzarella, or pepper jack)
1 Tbsp. parsley (thyme or rosemary will work also)
salt and pepper

Directions: Cook squash and shred when slightly cooled. Add butter to small pan and turn heat on to begin to melt. Add diced onion and cayenne pepper and cook until onions begin to brown. In a large bowl mix shredded spaghetti squash, onions, sour cream, Greek yogurt, 2/3 -3/4 cup of the cheese, parsley, and salt and pepper to taste. Place mixture in a 2 quart casserole dish and top with remaining cheese. Bake for 20 minutes at 375 degrees or until cheese is beginning to brown and squash begins to crisp up.


Monday, October 22, 2012

Peanut Butter and.......

Not jelly! Although that is coming next. But today I made peanut butter date balls with just 3 ingredients and they are SUPER good if I do say so myself. The husband says so too and even the picky eater likes them. She wasn't going to like them on a matter of principal but I made her try a bite and then she looked at me and said, "More food!" Then she came and helped herself to another one. Kid approved people!

I haven't made date balls in a long time. I have had to discipline myself because I eat too many of them when they are around. But I have camp this weekend with the teenagers and I like to bring along a few healthier snacks so my entire weekend doesn't go to pot. So I was making a practice batch. Plus I have lots of dates sitting around that need to be used up.

This is so simple. I promise.

One overflowing cup of unsalted peanuts. (I added another small handful because this wasn't overflowing enough) Dump those into the food processor and process into fine crumbs or for about 30 seconds. Remove them to another bowl.

Remember these? Nature's candy they are often called. You need 12 dates and you need to pit them. Place them in the processor and mix until they start to form a ball.

Add the peanuts back in along with 2 tablespoons of a creamy peanut butter. Process until the mixture just starts to come together. This is a very creamy peanut butter so if you have a thick one you may need to add a tablespoon or so of milk.

The mixture should look like this.

I just dump it out onto a piece of parchment or waxed paper and start to roll them into balls. Usually I use about a tablespoon of mixture per ball. If they won't hold just give the mixture a good squeeze in your hand. If that doesn't work you may need to put it back in the processor for a couple whirls.

I usually get anywhere from 25-30 date balls.

The problem is I eat some as I go because you have to make sure that they taste good before you roll them all out right?

Store them in the fridge in an airtight container for about a week or so. I love this for a before or after running snack but also as a sweet treat after lunch or dinner.

Keep in mind that while they contain no added sugar, dates are high in natural sugar, hence the name, "Nature's candy." Peanuts require the same kind of thinking. Lots of nutrition in these blessed portions of goodness but also not exactly a low calorie snack. So don't let yourself get out of control now!!!!

Please, please, try these! They are not some crazy health food freak snack. They are so yummy and so simple to make you will wonder why you waited so long.

Also, Walmart has removed your excuse that you can't find these dates! They are in the produce section and they have a yellow wrapper around them instead of the red one.

If you would like other flavors click on the link below or look under desserts on my recipe page. I think this good be flavor number 8 or 9 now!

Peanut Butter Date Balls
12 Medjool Dates, pitted
1 overflowing cup unsalted peanuts
2 Tbsp. all natural creamy peanut butter
(1-2 Tbsp. milk if necessary)

Process peanuts into fine crumbs in food processor. Remove and place in separate bowl. Process dates until they begin to come together and form a ball. Add peanuts back to bowl of processor. Add peanut butter and process until mixture comes together. Pour mixture onto parchment or waxed paper. Roll into balls. (about a tablespoon each) Let dry out a bit on the counter and then place in an airtight container in the fridge for up to a week.

Wednesday, October 17, 2012

Black Bean Chili Dip

I am becoming a recipe stealer. Sometimes that is just easier. Who am I kidding? It is always easier than trying to be creative and come up with your very own recipe. Plus when I made stole, the recipe for Spicy Shredded Crock pot Chicken from Kalyn's Kitchen she, a real big time blogger, left me a comment. I was so excited and a little scared that I had screwed something up or that she would scold me for stealing her recipe and blogging about it. But she was just thankful that I enjoyed it and that I had credited her properly with a link to her website. Whew! It was a little like that feeling you would get when the phone rang in your classroom in Jr. high or high school. Even though you knew you hadn't done anything you were still worried it was the Principal's office calling for you for some reason. I hated that feeling!

So the recipe stealer was at it again! But this time I stole from Oh She Glows. Don't they say to steal from the best? These are two of my favorite healthy food blogs. Maybe you should just follow them instead of me. Go there now for better pictures for sure! Black Bean Chili Dip

Get to the recipe for pitty's sake!

Guess what?
I followed the recipe.
I measured. 
It's a miracle.

Start by sauteing some onion and garlic in a little olive oil.

Add some diced jalapeno. Make it easy on your self and buy it in a jar already diced up or you can be really good and get a fresh jalapeno. This is what really adds the kick so if you are a baby about spicy foods like me go easy.

After a few minutes add one can of drained and rinsed black beans, 1 cup of your favorite salsa, and 1 cup of frozen corn. Don't thaw out the corn. It will cook right up with all the ingredients. No worries.

After that has cooked a few minutes add these spices. Oh She Glows is a vegan blog so that is the main reason for the nutritional yeast. Vegans use it for a source of protein and vitamins but I am all for adding some extra protein and vitamins even if I am not a vegan.  It has a nutty and cheesy flavor to it. So this ingredient is optional for you but Miles did remark on the flavor of this dish being unique so perhaps it was this little extra ingredient! You will need one tablespoon of nutritional yeast, 2 tsp. of the chili powder, 1 tsp. of the cumin, and 1/2 tsp. salt. 

Just stir those spices around in there and continue to let this heat up for about 10 minutes or so. This gives the flavors time to blend together nicely.

Now you can just place this goodness in a bowl and serve with your favorite chips and recommended toppings on the side or you can make a few serving changes like we did.

Instead of just dipping chips in we layered chips in the bottom of these pie tins, topped with the bean dip and a bit of cheese, (no longer vegan, oops!) and put them in the oven for about 5 minutes. When they were done we topped them with the recommended toppings Angela gave on her blog, green onion, avocado, and cilantro.
AMAZING!

So since we wrecked the "vegan-ness" of this dish I figured why not add a little sour cream on top also. I like to mix a little sour cream with some Greek yogurt sometimes too for a little tangier taste and more nutrition.

I made this dish again for small group on Sunday evening and switched it up again. I followed the recipe but then put it in a round baking dish and spread some cheese over the top and then baked it for 10 minutes at 400 degrees. Nice golden cheesy goodness. I brought all the toppings along in a separate dish for each individual to top how they liked on their own plate. (I forgot to take pictures. Darn.)

And if three ways to eat it aren't enough, Miles used the leftovers in his eggs both times I made this dish. We would be terrible vegans.

Now file this recipe away for holiday gatherings and Superbowl fare or get busy making fun weekend food on a Wednesday evening! I promise all will love it!

Black Bean Chili Dip
2 small onions chopped (or about 1.5 cups)
1 clove garlic
diced jalapeno (add as much or little as you like or use 1 jalapeno seeded and chopped)
1 can black beans, drained and rinsed
1 cup frozen corn
3/4 -1 cup mild salsa
2 tsp. chili powder
1 tsp. ground cumin
1/2 tsp. salt
1 Tbsp. nutritional yeast (optional)
olive oil
Optional Toppings: cilantro, avocado, green onion, cheese

Directions:
In a large skillet saute onions and garlic in a bit of olive oil over medium heat until onion begins to brown. Add in diced jalapeno and cook a few more minutes. Add black beans, corn, and salsa all at once and stir to combine. Cook for a few minutes. Add chili powder, cumin, salt, and nutritional yeast. Reduce heat and continue cooking until heated through.

Serving Suggestions:
Place dip in a bowl and garnish with toppings of your choice. Serve with your favorite chips. We like Trader Joes Veggie and Flaxseed chips which they now have in spicy!

Place bean mixture in a baking dish and top with cheese. Bake at 400 degrees for approximately 10 minutes. Serve warm with toppings on the side.

Make an omelet or scrambled egg hash with any leftover bean dip.


Friday, October 5, 2012

Spicy Shredded Slow Cooker Chicken with Avocado Salsa

I love my crock pot. I love it when dinner is all ready when I walk into the kitchen. It is like a little present I wrap up in the morning to give myself in the evening. My crock pot really needs to get more use from me though since it does make life easier. In fact I would love to have a whole tab on my home page for healthy slow cooker recipes. Some for breakfast, lunch, and dinner and some that are vegetarian and some that are not would be great. Maybe that should be my new project.

Anyway back to the day I gave myself a present. I completely stole this recipe from Kalyn's Kitchen. So here is the link if you would just prefer to get right to business and skip all my babbling. I only made two small changes.
 Slow Cooker Spicy Shredded Chicken Lettuce Wrap Tacos with Avocado Salsa

If you like my babbling then please continue on........Okay so maybe just endure it so you can get to this very simple recipe and give yourself a present too.

You will need 1 cup of your favorite salsa or use your homemade. Mine is sadly all gone. Then you will also need a can of chopped green chilies, juice of one lime, a teaspoon of onion powder and hot sauce of your choice. This was one of the changes I made from the original recipe. Mainly because Franks is what I had. Kalyn used Cholula hot sauce. I didn't add too much because I wanted the kids to eat it.

Mix that all together in a small bowl.

Place your chicken in a 3 quart crock pot. This is approximately 4 chicken breasts I cut up into smaller pieces.

Pour the salsa mixture over the chicken and put the lid on. I didn't even stir it!

Turn it on low and cook for 5 hours. A smaller crock pot does work best for this but if you only have a big one go ahead and use it. I might suggest just making a bigger recipe of it in that case. We really would have liked to have more left over anyway and you could always freeze some for another day and make your life even easier.

Pull the chicken out with a slotted spoon to drain and shred it with two forks or your fingers if you prefer. It really fell apart on me. I think it took me all of 30 seconds to shred because it was so tender.

Put the chicken back into the crock pot with the sauce to soak up some more goodness and to keep it moist and tender.

Pause what you are doing when your friend Margaret comes over to show you her new camera she got for her birthday because she knows you will appreciate a new camera! Funny thing was she came in and said where is your camera. I said right here on the counter because I am cooking! I took her picture while she took mine.
 (P.S. Her camera is better than mine. I am slightly jealous.)
(P.P.S. Ignore those 1977 kitchen cabinets or donate to my fund to replace them. Take your pick.)

While the chicken is soaking up a little more goodness whip up some avocado salsa to go with this delicious chicken you magically made appear in what feels like 10 minutes.

It was so delicious! You just need some red onion, cilantro, lime juice and 1-2 avocados. Stir it gently so the avocados stay in nice chunks.
I served it on Bibb lettuce which was my other small change. Kalyn served hers on iceberg lettuce because it works better as a boat for this kind of thing. I don't love iceberg lettuce. Not enough nutrition for me so I picked Bibb. For the kids I rolled the meat up in a tortilla with some cheese. We skipped the carbs because honestly we prefer it this way. But it would also be good on top of a tostado the way Kalyn suggested on her blog. I would have done that with the leftovers for lunch the next day but I didn't have any and Miles was making lunch! Hooray!

We just ate some simple fruit on the side. It was a wonderful dinner!! Even the non- meat loving child enjoyed hers. It helped that her friends were playing in our yard waiting for her to finish so she could come outside too.

Now here is what I love:
1. It took me less than 10 minutes to mix up the sauce and throw everything together in the crock pot. I did it while I made lunch actually.
2. I walked away and did lots of other things for 5 hours.
3. My friend Margaret stopped by and I had time to talk to her and give her a quick lesson on ISO speeds because all I had to do for dinner was mix up the avocado salsa.
4. It took me less than 10 minutes to shred the chicken, mix up the salsa, and cut up the fruit. I like meal prep broken up into 10 minute increments.
5. LEFTOVERS! Cook once eat twice, or thrice!
6. Flavor..........YUM, YUM!
7. Something new for a change and pretty healthy too!

Now like I said at the beginning, I must get to work on some more crock pot recipes.
I like presents!

Enjoy your weekend!

Spicy Shredded Slow Cooker Chicken with Avocado Salsa
4-6 chicken breasts cut in half or thirds
1 cup salsa
1 can diced green chilies
1 tsp. onion powder
juice of one lime
hot sauce of choice (I used only a tsp. but make it has hot as you like)
Lettuce, tortillas, or tostados for serving

Avocado Salsa
1-2 avocados diced into small pieces
1/2 cup cilantro, chopped
1/4 - 1/2 cup red onion diced
juice of one lime

Directions: Clean and prepare chicken and place in a 3 quart crock pot sprayed with cooking spray or olive oil. Mix salsa, green chilies, onion powder, lime juice, and hot sauce together in a small bowl. Pour over chicken. Place lid on crock pot and cook on low for 5 hours. Shred chicken with two forks or with fingers and place back into crock pot with sauce and stir. Prepare avocado salsa by gently mixing all ingredients together.
To serve: Prepare lettuce. (or tortillas or tostados). Using a slotted spoon remove shredded chicken from sauce and place on top of lettuce cup. Top with avocado salsa.

Note: If you use closer to 6 chicken breasts you may not have extra sauce and therefore won't need a slotted spoon.